Replacing Lenses on Kodaslide I Stereo Viewer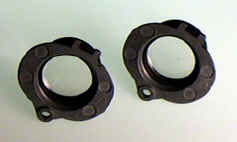
This is for replacing the lenses on a Kodaslide I viewer with our achromatic
47mm lenses.
1. Use a spanner, pull the lens retaining ring (remembering which part of the
achromat is front and which is back, and take out the lens. Put the retaining
ring back in.
2. Put the lens housing in a vice and hacksaw off the backing plate as close
as you can get to the plate.
3. Dress the rough sawcut area with a Dremel.
4. Back the lens retaining ring out, which nicely recuts any thread damage.
Put the lens back in. Put the retaining ring back in.
5. Take the K1 apart and using an Xacto knife, carefully weaken and remove
the glued in plastic retaining ring that holds the plastic lens in the housing.
Place the original plastic lens in the garbage.
6. You need to be especially careful, because this housing isn't metal, it's
some kind brittle plastic.
7. Clean up any rough areas in the original housing, which is now lens free,
and insert the modified achromatic
47mm lens. I do this on a chunk of quarter inch
plate glass, so I know the lenses are both parallel.
8. Use superglue or epoxy and seat the lens distance, having measured the
distance to the center of sharp focus. Of course, you previously measured this
in millimeters...
9. Darken any shiny metal with flat black paint.
10. Lenses and housings done. BUT... since you have the thing apart, tighten
up the focusing. Also, use a nibbler (available from Radio Shack) and widen the
metal aperture in the slide carrier so the viewer can accommodate wide format
slides. Be sure to leave no sharp edges from your nibbling-- Dremeling all sides
front and back of the aperture is recommended, so you don't end up slicing the
emulsion to ribbons by passing it over a razor sharp metal spur in the modified
metal slide carrier.
11. Clean everything and reassemble. And of course, do this at your own
risk...
Thanks to Elliot Swanson for these instructions.